clean install
What is a clean install?
A clean install is a software installation in which any previous version is eradicated. The alternative to a clean install is an upgrade, in which elements of a previous version remain. The terms are often heard in reference to operating systems (OSes) and software applications.
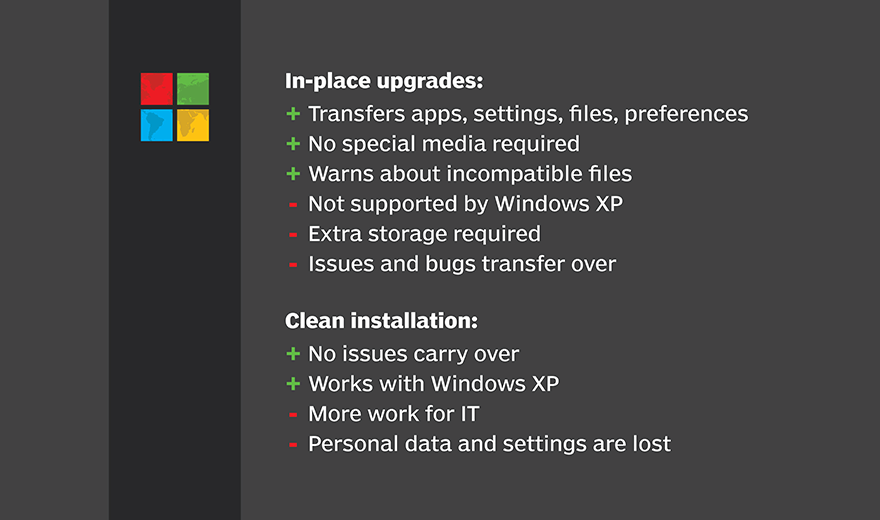
Whenever an OS is installed on a new computer, or an application is installed for the first time, the installation is considered a "clean" install. With a clean install, the hard disk contains only the new OS. Any existing OS and user files are removed during installation because the hard disk is formatted and completely erased.
Since existing data will be lost after the clean install, the user should back up all data and files beforehand to an external hard drive, another computer or to an online/cloud location to prevent inadvertent loss. It is also a good idea to check the backup to ensure that it contains all the data and files that the user wants to retain and potentially access at a later time.
A clean install differs from an upgrade -- also known as in-place upgrade or in-place install --in which the existing version of the OS or application is retained but updated with the addition of new elements. In an upgrade, user data, files and settings are retained.
If the clean install is for a newer version of an existing software that's already running on the computer, it is known as a clean upgrade.
Both Windows and Mac OS X systems allow a clean install for the OS. Usually, the installation Wizard provides the user with a choice at the beginning of the installation process to select either a standard upgrade (the default option) or a clean install.

When a clean install is required
A clean install can be a time-consuming process that requires some technical skills and knowledge. In many cases, a clean install is not required to upgrade the OS or application. At such times, it can be easier and safer to opt for a standard upgrade and install. However, there are some situations where a clean install is necessary.
For example, a clean install is preferable when a new user is assigned to a computer (e.g., because the previous owner sold it to a new owner), and also when the OS is installed on a new hard drive.
Here are other situations where a clean install is required:
When important files are corrupted
When an OS upgrade is not possible, due to corrupted or lost files, a clean install may be the only option available to the user.
Worries about the previous OS
Similarly, if there are concerns that the previous OS could negatively affect the newly installed OS, a clean install is better than an upgrade.
When software troubleshooting fails
If a software program or an OS stops working and troubleshooting fails -- including trying the reset feature offered by many OSes -- a clean install is necessary. However, a clean install should only be done if there are serious problems with the OS. This is because all the data on the primary hard drive partition gets erased during the clean install process, and cannot be retrieved later.
To get a fresh start with a clean Windows Registry
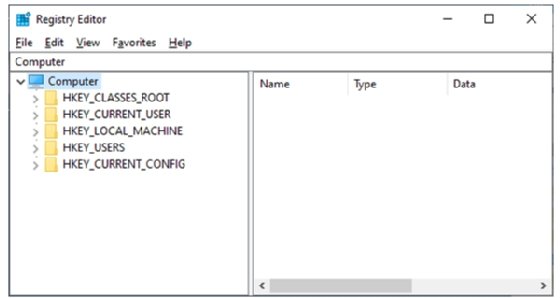
A clean install enables users to regain control over the system by eliminating programs and files that have not been used for a long time, if ever. It paves the way for a fresh start with a clean Windows registry and a decluttered system that includes only has the apps the user needs.
Improved performance
A clean install can improve computer performance and speed, which may not be possible with an in-place upgrade, especially on an old system that's been running the same version for a long time.

Performing a clean install of Windows 10
A full, clean reinstall of Windows is not the same as the "Reset your PC" option in the OS. The latter simply sets the PC back to its factory-default state, which may include some vendor-installed applications or bloatware. With a clean install, the user starts over with a new Windows OS.
A clean install of Windows 10 helps declutter the computer, frees up space, and eliminates performance and speed issues. It also helps remove viruses, Trojans, malware and bloatware from the system, and eliminates system problems like blue screen errors.
Before performing a clean install on Windows 10, it's imperative to back up the entire system, or at least all crucial files, partitioned drives and the recovery drive. It's also important to list which programs need to be reinstalled. For reinstallation, the original installation disks/drivers and/or information about program setup are required.
There are two methods to perform a clean install in Windows 10. They include:
- the built-in fresh start option
- creating installation media
Performing a clean install in Windows 10 with built-in fresh start option
The steps involved in performing a clean install for Windows 10 by this method include:
- Navigate to Settings from the start menu.
- Click on Updates & Security and navigate to Recovery from the left menu. Under More recovery options, click on Learn how to start fresh with a clean installation of Windows.
- A Microsoft webpage will open containing a link to the refresh Click on Download tool now.
- Once the tool finishes downloading, open the file from the downloaded folder, and run it. Two choices will be displayed. Choose Nothing and click on Start.
- The clean installation process begins. Once it completes, the login screen will be displayed and the user can log in as usual.
- After user login, setup begins. Once setup is complete, the user should check for updates, redownload saved files and reinstall any apps and drivers as required.
Performing a clean install in Windows 10 by creating an installation media
Here are the steps to perform a clean install via an installation media like a flash drive:
- Navigate to System Information from the Start menu and find the particular language of Windows to ensure that the same version of Windows is reinstalled.
- Navigate to the Microsoft website and download the tool for fresh install. Open the file from the folder and run it (admin login is required).
- Read and accept the Terms of Service agreement when the Windows 10 setup window opens.
- Plug in a clean flash drive and choose Create installation media for another PC. Then, click Next.
- Select the language, architecture and edition.
- Then, under Choose which media to use, click USB flash drive and Next.
- Select the flash drive that's plugged in and click on Next.
- Windows 10 will start downloading to the flash drive. Once the download is complete (which could take a long time), the system will display, "Your USB flash drive is ready." Click Finish.
- Now, proceed to Settings from the Start menu and click on Updates & Security.
- From Recovery in the left menu, click on Restart Now under the Advanced startup
- Under Choose an Option, click on Use a device and choose your device from the menu.
- Follow the onscreen prompts and choose the language and keyboard preferences. Finally, click on Install Now.
- Choose the operating system and accept the license terms.
- Click on Custom: Install Windows only (advanced). Remove the flash drive.
- Select the installation location and click New. Finally, click Apply and OK.
- Click the main (largest) partition and then click Next.
- Windows will restart several times as part of the clean install process, and finally the process will be complete.
- Once setup is complete, check for updates, redownload saved files and reinstall any apps and drivers as required.
See everything you need to know about Windows 11 and the differences between Windows 11 and Windows 10.


